Thursday, 15 August 2013

The Last Post (almost)

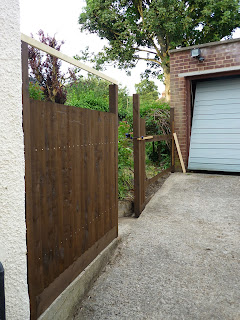
The aris rails on the long section seemed determined to undermine the accepted wisdom that the shortest distance between to points is a straight line.  In retrospect it was perhaps asking too much to expect them not to bow and twist given the gyrations in temperature and humidity recently.

The solution I came up with was to add an extra 'post' screwed to both rails, to help get them back on the straight and narrow. The width of 3" should match in with the visible width of the boards.


At the base of the fence the gravel board stays level and thereby disappears into the slope of the drive.  There's also a retaining board to keep the earth away from the back of the fence.


Finally the painted feather-edge boards get pilot holes drilled to prevent splitting and get nailed in place.


The temporary spacer between the gate posts is to encourage them to maintain an even spacing until the gate is fitted.


Thursday, 8 August 2013

The Fence Post Hokey-Cokey

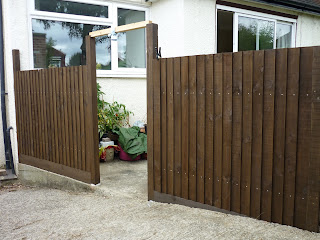
The second post that had to be set into the metal holder in the concrete proved more troublesome. It got well and truly stuck, half way in.  I had to resort to a block of wood with a tenon inserted in the post mortice, and a car jack to get it out.  It was variously in, out and shaken all about.  I finally got it in satisfactorily and started to forge ahead with the second section.


Sunday, 4 August 2013

Fence post #7

There's no substitute for looking at everything in place before the final fixing, and I decided the top of the boards seemed a bit low.  I had a plan for this in mind, simply adding a gravel board to raise the level by about 6 inches.  I tried this out and then went ahead with the final design.


The gravel board is screwed to the post using pocket screws, and I made a jig from a feather board off-cut to ensure even spacing.  The overlap of the boards is 11/16 of an inch and they are nailed using 1½" (40mm) galvanised nails. 


Thursday, 1 August 2013

Fence Post #6

In the past few days I have:

  • Finished and fitted the last mortice & tenon
  • Painted the posts and rails with timber treatment
  • Made a wooden cap to protect the top of the post while I 'persuaded' it into the metal post holder with a sledgehammer.  The cap broke up on the final blow, but did its job.
  • Final installation of the posts and rails for the first section.  This took a bit of patience with only two hands but I got there in the end.


I clamped a few boards to the rail to give an idea of how they will look.

Today I started giving each featheredge board a light sand and paint.  There's over 60 to do, so it's a good job I can listen to the cricket in the background!